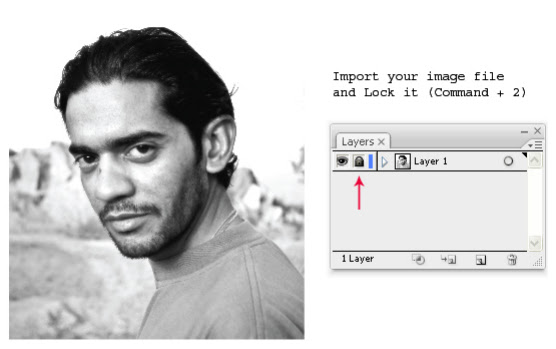
Create a new document and click on File > Place. Select your image/photograph and hit Place to import the image on stage. (Unchecked the Link box if you want to retain the image file permanently in your document). Next, select the image and lock it using Command + 2.
Step 2
Depending on the complexity of your image, decide on the number of shades that are forming the image. Here, I’ve defined three different shades. i.e. blank for the brightest parts, single lines for medium shade, and intersecting lines for the darkest shade. You may further play with the number of lines to define different shades.>
Step 3
Grab the Line Segment Tool (\) from Tools pallet and draw a horizontal line of width approximately larger than your image. Place it on the top most part of your traceable area and stroke it with any contrasting color.
Step 4

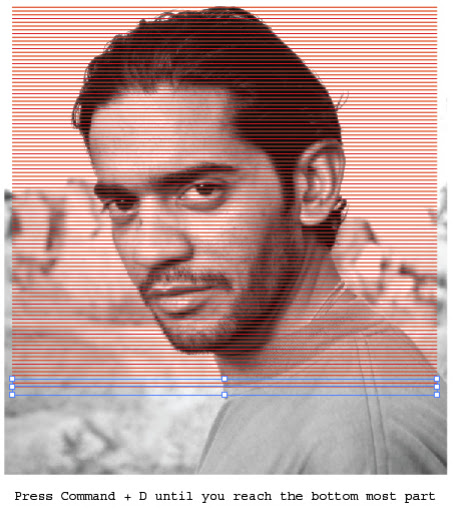
Select the line and click on Object > Transform > Transform Each (Alt + Shift + Command + D). Enter -10px for Vertical Move and click on Copy. Next, press Command + D until the lines reach to the bottom most part of your image. (Note: you may enter any value for the vertical move that is fairly legible in proportion to your image dimensions. I have used -15px here).
Step 5
Select all the lines and Alt + Drag to duplicate. Next, rotate the duplicate set to 90 degrees and place it away from your artboard, as we will use it later.
Step 6: Vertical Tracing
Start from the top most line and resize each line horizontally in such a way that its end points touch the borders of the traceable area. You may do this with the Selection Tool (V). Our aim is to cover the traceable area with horizontal lines.
Step 7
While resizing each line, exclude the bright regions. At some stages, you will find all types of shades falling in the same horizontal path. For that, duplicate and place the lines wherever the dark shades appear.
Step 8
Select all the horizontal lines and lock them by hitting Command + 2. Next, grab the duplicate set that we created in Step 5 and place it on the left most side of the traceable area.
Step 9: Horizontal Tracing
Start from the left most line and follow the same procedure as in Step 6 and Step 7. Resize each line vertically to cover the dark shades. Exclude the brightest parts, cover the medium shades and intersect the darkest shades as shown in the figure. Duplicate the lines if needed. Follow this until you reach the right most side of the image.
Step 10
After the tracing is done, unlock all (Command + Alt + 2) and remove the background image. Select all lines and group them (Command + G). You can play with the stroke color and width to achieve the best result.


கருத்துகள்